Add a rating to a member
Last updated 5 June 2026
Ratings record a member's gliding qualifications — BFRs, medicals, QGP, instructor ratings, and so on. Each rating has a granted date, an optional expiry, the person who authorised it, and any supporting documents you attach. A member's Ratings page lists all of them and flags any that are expiring soon or have already lapsed.
Before you start
- You need to be a club administrator of the member's club, the awards officer, or a GNZ administrator (the Admin or Root role). Other GNZ members can view a member's ratings but can't add them.
- A few ratings can only be granted by the awards officer or a GNZ administrator: XCP (Cross Country Pilot), QGP, Official Observer, and Senior Official Observer. As a club admin without one of those roles, you'll be refused when you try to save them.
Step 1 — Open the member's Ratings page
Go to Members and open the member you're adding the rating to. On their record, click Ratings at the top right.

Step 2 — Open the Add Rating form
Click Add Rating at the top of the ratings list. The form opens above the member's existing ratings.
Step 3 — Choose the rating and granted date
- Pick the qualification from the Select rating… dropdown.
- Set the Granted Date — it defaults to today, so change it if the rating was awarded earlier.
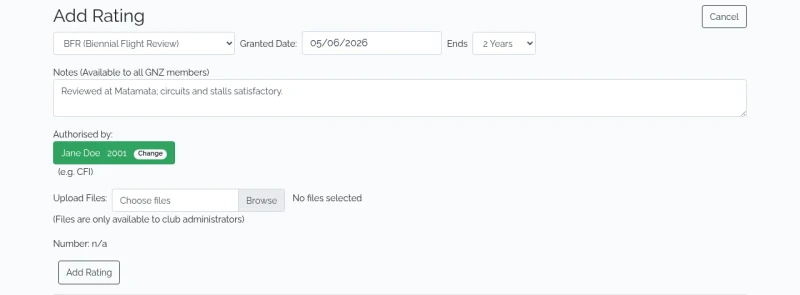
Step 4 — Set when it expires
Use the Ends dropdown to choose how long the rating lasts: Never, 1 Year, 2 Years, 5 Years, or Custom (enter a number of months). Choosing a rating pre-selects its usual expiry for you — adjust it only if this particular award is different.
Step 5 — Record the authoriser, notes, and documents
- Notes — anything worth recording. These are visible to all GNZ members.
- Authorised by — start typing to find the member who signed the rating off (for example, the CFI), then select them.
- Upload Files — attach supporting documents such as a medical certificate. These are optional and are only visible to club administrators.
- Number — for ratings that carry a sequential number, enter it here. The form shows the last number used, with a Set to … button that fills in the next one.
Step 6 — Save the rating
Click Add Rating at the bottom of the form. The page confirms Rating Added and the new rating appears in the member's ratings table.
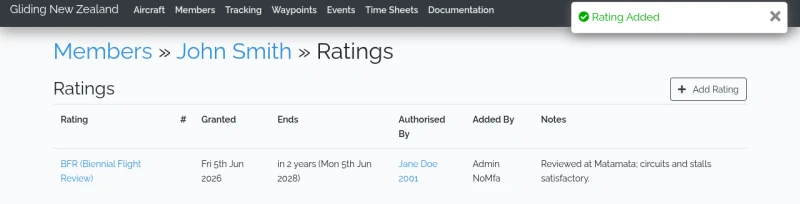
What happens next
The ratings table lists each rating with its #, granted and end dates, who authorised it, who added it, and any notes. Rows turn amber when a rating is close to expiring and red once it has lapsed, so you can see at a glance what needs renewing.
To review a single rating, attach more files, or end it early, click the rating's name in the table.